If you want a method of how to Unlock Nexus Device Bootloader, then you must read this complete article and learn the method to easily unlock it. Everyone has the priority to unlock it and then move ahead.
Because it is necessary to unlock it to flashing a factory image, rooting the device, or trying to install a custom ROM on it. All is that, to use your Nexus device, you need to unlock its bootloader. Here we provide all the help for users to fulfill their needs.
It is also necessary that everyone would know about bootloaders. Because the new user has no idea about it.
Table of Contents
What is Bootloader?
All mobile devices come with an operating system that helps them to turn on the smartphone, and run the apps. The operating system performs many tasks on every device.
It is amazingly designed that easily execute in mobiles and there is a piece of code that runs in it. Similarly, the bootloader is that piece of code that is executed before the operating system.
It means that it is also an important thing for your devices. Hence, the bootloader includes the instruction to boot the OS kernel. And it easily executes before the operating system.
Remember that all the bootloaders in different devices are processor-specific and every motherboard has its own specific bootloader.
All the information is just to remind you that this is the reason behind all the Android devices that they have their own processor and motherboard.
Android Bootloader
Many people know that Android is an open-source operating system. It is understood that Android device manufacturers customize the OS as per their liking and install it on the hardware of their own choice.
This is the reason that every manufacturer has its own version of bootloader specific to their hardware. It is very easy and simple to understand its working and increase your knowledge about it.
There are further questions which are important for everyone’s knowledge. So, every Android user has to understand the points and clear them in their minds as well. Other knowledgeable questions are as follows:
Why is the bootloader locked by default?
As you know that every android manufacturer takes Android from Google. It is also understood that android modifies it according to their liking, adds their own services, customization, and apps (bloatware?).
Thus, when Google releases their devices with their own flavor of Android, they do not want that their customers move to another operating system.
It is the main cause to add many extra features in android devices for users’ help. Similarly, they do not want users to tinker with or replace the company’s version of Android with any other.
In this way, we found the locked bootloader beneficial because a user would not be able to modify or flash another custom ROM on the device.
Why should I Unlock Bootloader?
The bootloader is important to install a factory image (in the case of Nexus devices), and you can easily root your device with it. Moreover, it is used to flash a custom ROM on your device.
That’s why you have to unlock it first and then use its a lot of features. Otherwise, you cannot get the benefits of the bootloader in your Nexus device and fulfill your desires.
How to Unlock Bootloader of Nexus 6P/5X/6/5/4, Nexus 7/9/10
This is the main task and informative line to know how to unlock it in your Nexus devices. As we know that Nexus devices are considered to be a developer-friendly lineup. Hence, they come with a locked bootloader. Hence, it is very easy to unlock simply, and in this guide, we are going to show you how to do that.
You can try the following steps that are only compatible with Nexus devices including Nexus 6P/6, Nexus 5X/5, Nexus 4/7/9/10.
IMPORTANT NOTE: You have to know that the unlocking bootloader will wipe your device clean, delete your personal data, and erase everything from your device. There is including all types of data such as your messages, photos, contacts, applications, and everything else.
- To unlock the bootloader in your device, you have to back up your important stuff from the device.
- Also, you have to charge your Nexus device before unlocking the bootloader.
Easy Steps to Unlock Bootloader
- First of all, you have to install Android USB drivers and set up ADB & Fastboot for your Nexus device.
- Now, you have to “Enable USB debugging mode”.
- For this, you can go into Settings and then Developers options.
- Now you have to switch the USB debugging toggle to ON. It will notify you after debugging.
- But if you cannot find the Developers option, then go to Settings and go to About phone. Here you have to tap on the Build number until you see a message that Developers options have been enabled.
- Now, you have to turn off your Nexus device and quickly put it in Fastboot mode
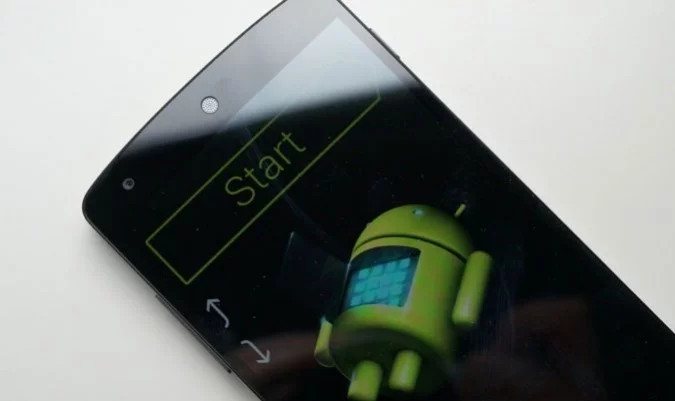
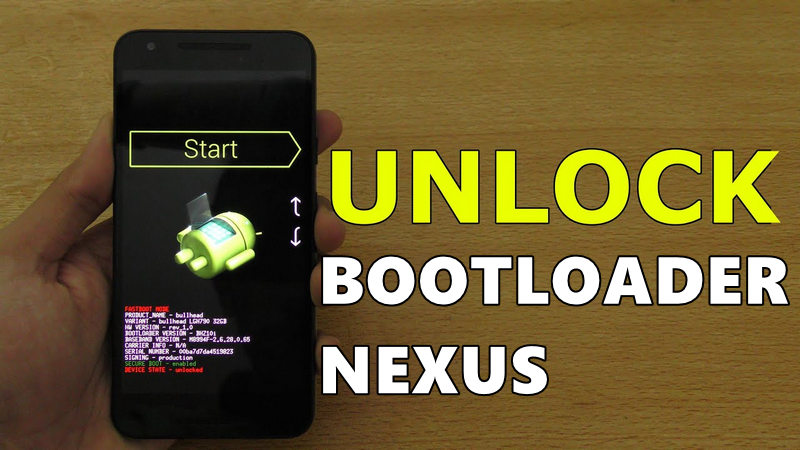
- For this, you need to press and hold both the “Power” + “Volume Down” + “Volume Up” buttons. There will appear an Android Robot with a big Start label at the top.
- You can now plug your Nexus device into your computer via USB cable.
- Here you need to open the command prompt.
- For this, you have to press Windows + R and type in cmd.
- Now you need to hit Enter key on your keyboard.
- You need to type in the following command and then press the Enter key quickly.
fastboot reboot
-
- (fastboot flashing unlock) is for Nexus 6P or Nexus 5X.
fastboot flashing lock
-
- (fast boot OEM unlock) is for older Nexus Devices.
fastboot oem lock
- You need to confirm if you really want to unlock the bootloader.
- Thus, you have to use Volume keys to navigate to “Yes” and then press the Power button to confirm.
- Rest your device now and let it do its thing. When it did with unlocking the bootloader, you have to enter the following command: (fastboot reboot).
- All is done successfully and your device should reboot with an unlocked bootloader. Simple is that now you can restore your stuff from the backup.
- Enjoy Unlock bootloader in your Nexus device.
Related Posts: