TWRP stands for TeamWin Recovery Project. This open sources software provides a touchscreen-enabled interface. It is designed especially for Android users which is a powerful tool. Also, it provides full control over the insides of your phone without needing to boot.
As well as the interface increase performance of Android device and make it smooth. Also, it allows users to install third-party firmware. The users can also back up functions often unsupported by stock recovery images.
This amazing software is really beneficial for Nexus 5X devices which provides flexibility and more. How to install TWRP on the Nexus 5X. This guide will show you how to easily flash the TWRP recovery on a Nexus 5X.
It comes with a lot of benefits and the Nexus users. If you are interested to tinker with your Google Nexus 5X and install custom ROMs, then this is the best project. Every Nexus user can enjoy its work and performance that will be amazing.
It is necessary to install customs in the Nexus device through TWRP. It is most beneficial because TWRP custom recovery on your Nexus 5X, that provides the ability to easily flash any custom ROM, official firmware, create and restore a full backup image of your device.
We can say that it gives you ultimate control over your device.
What is Root?
It is a special and useful process for smartphones to get an unofficial way to enable an administrator or superuser access to your device system and subsystem. In this way, the user can easily tweak, change, edit, or delete system files and apps easily.
It is also beneficial to uninstall bloatware and also helps to increase device performance. It is a useful way to reduce battery draining, install Xposed modules, and more.
Benefits of TWRP Recovery
- It allows you to flash Custom ROM on Nexus 5X using TWRP.
- It enables you to flash modding zip files to customize your phone.
- Also, it makes it easy to flash and use Xposed Modules using TWRP.
- You can easily root and Unroot using TWRP Recovery flashable zip SuperSU.
- You will be able to install Magisk on Nexus 5X.
- It enables you to create and Restore Nandroid Backup.
- You will get access to restore the Nandroid Backup.
- You can remove all bloatware by using TWRP.
Pre-Requirements
- You have to charge the Nexus 5X device to avoid any kind of interruptions.
- Stable Internet Access
- USB Cable
- You need to take a backup before you proceed.
- To install TRWP Recovery, you need to download ADB on your computer.
- You need to download and install USB drivers on your Windows or Mac.
- Also, you need to download fast boot.
Easily install ADB and Fastboot on Windows and Mac
For the TWRP recovery process, you need to install ADB and Fastboot on Windows or Mac. If you are and you have no idea to download and install these tools on your PC Windows or Mac, then you should learn it first. It is a very simple and easy method, so just click here to follow some guides.
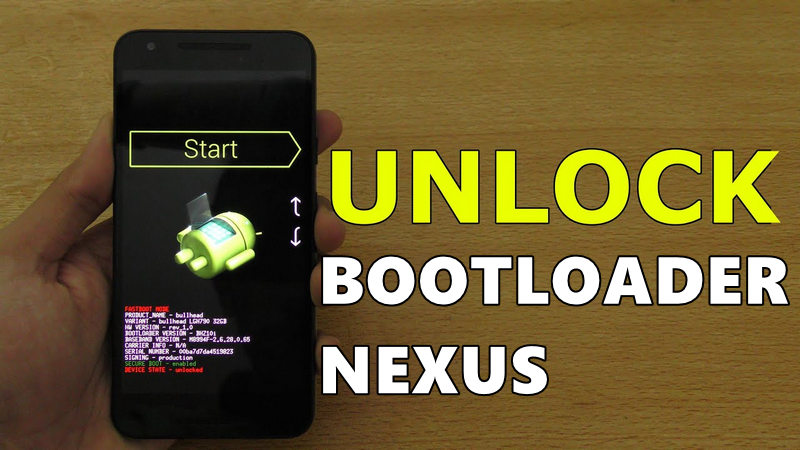
How to unlock the bootloader of Nexus Devices
This is an essential part to recover your device with the TWRP tool. You cannot skip it because it is useful for you. If you have no idea how to unlock the bootloader of Nexus devices, then don’t worry. Because it is very simple and easy. The complete method also provided on this web page because it is helpful to unlock the bootloader. Click here to get the complete method.
Download TWRP Recovery Files on Nexus 5X
It is very simple and easy to download the complete TWRP tool files on your Nexus device. Without any issue, you can download it free from here. Click on the link to Download TWRP Recovery Complete Files.
How to Install TWRP Recovery on Nexus 5X
To learn how to install it on your device, you need to follow some provided steps. This is a complete guide to get a complete method of process. The easy steps are as follows:
- Red the Pre-Requirements lines and make sure you have everything.
- Now Turn off your Nexus device by the press and hold the Power + hold button simultaneously.
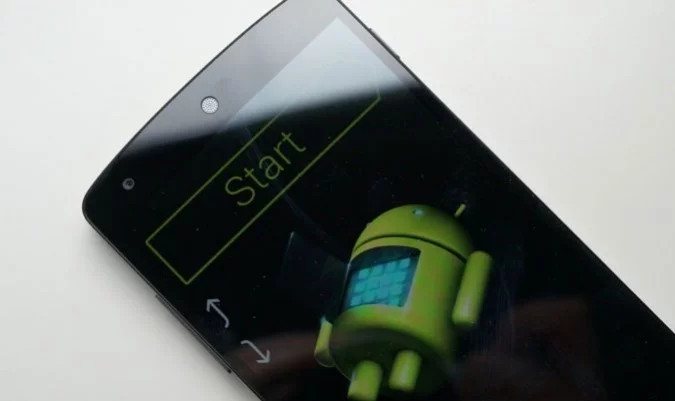
- Your device should enter bootloader mode in few seconds.
- Now it is needed to connect your Nexus 5X to your computer via USB cable
- You have to make sure USB drivers have been properly installed on your PC or laptop.
- Now you have to go to the download folder of TWRP on your desktop. Now hold down the shift key on the keyboard of a PC or laptop, right-click anywhere inside the nexus folder, and choose the Open command window here.
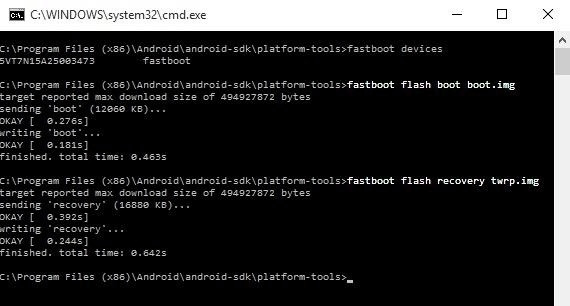
- You have to type the following commands and hit the Enter key after each command:
-
- fastboot flash boot boot.img
- fastboot flash recovery <filename>.img
- It’s time to use the Volume keys to navigate to the Reboot Bootloader option.
- Then you have to press the Power key to reboot into bootloader. As well as the Nexus 5X will reboot into the bootloader again and you have to use Volume keys to navigate to the Recovery mode option.
- Now you can press the power key to boot your device into freshly flashed TWRP recovery.
- In the last, you’ll see a menu asking to make TWRP your permanent recovery. For this, you have to swipe the slider at the bottom to do so.
- All is done successfully and you can disconnect your Nexus device from your computer.
Related Posts: